Push to Your Own Domain: Managed Add-ons + Custom Domains

Our earlier build-your-own-PaaS blueprint wired up ingress, TLS, and DNS by hand. Now it's three managed add-ons and one domain verification: install NGINX + cert-manager + ExternalDNS, verify a domain once, and every container image you deploy comes up on your own domain with real, auto-renewing HTTPS. Do it from the console, the CLI, or just ask your AI. All three drive the same platform.
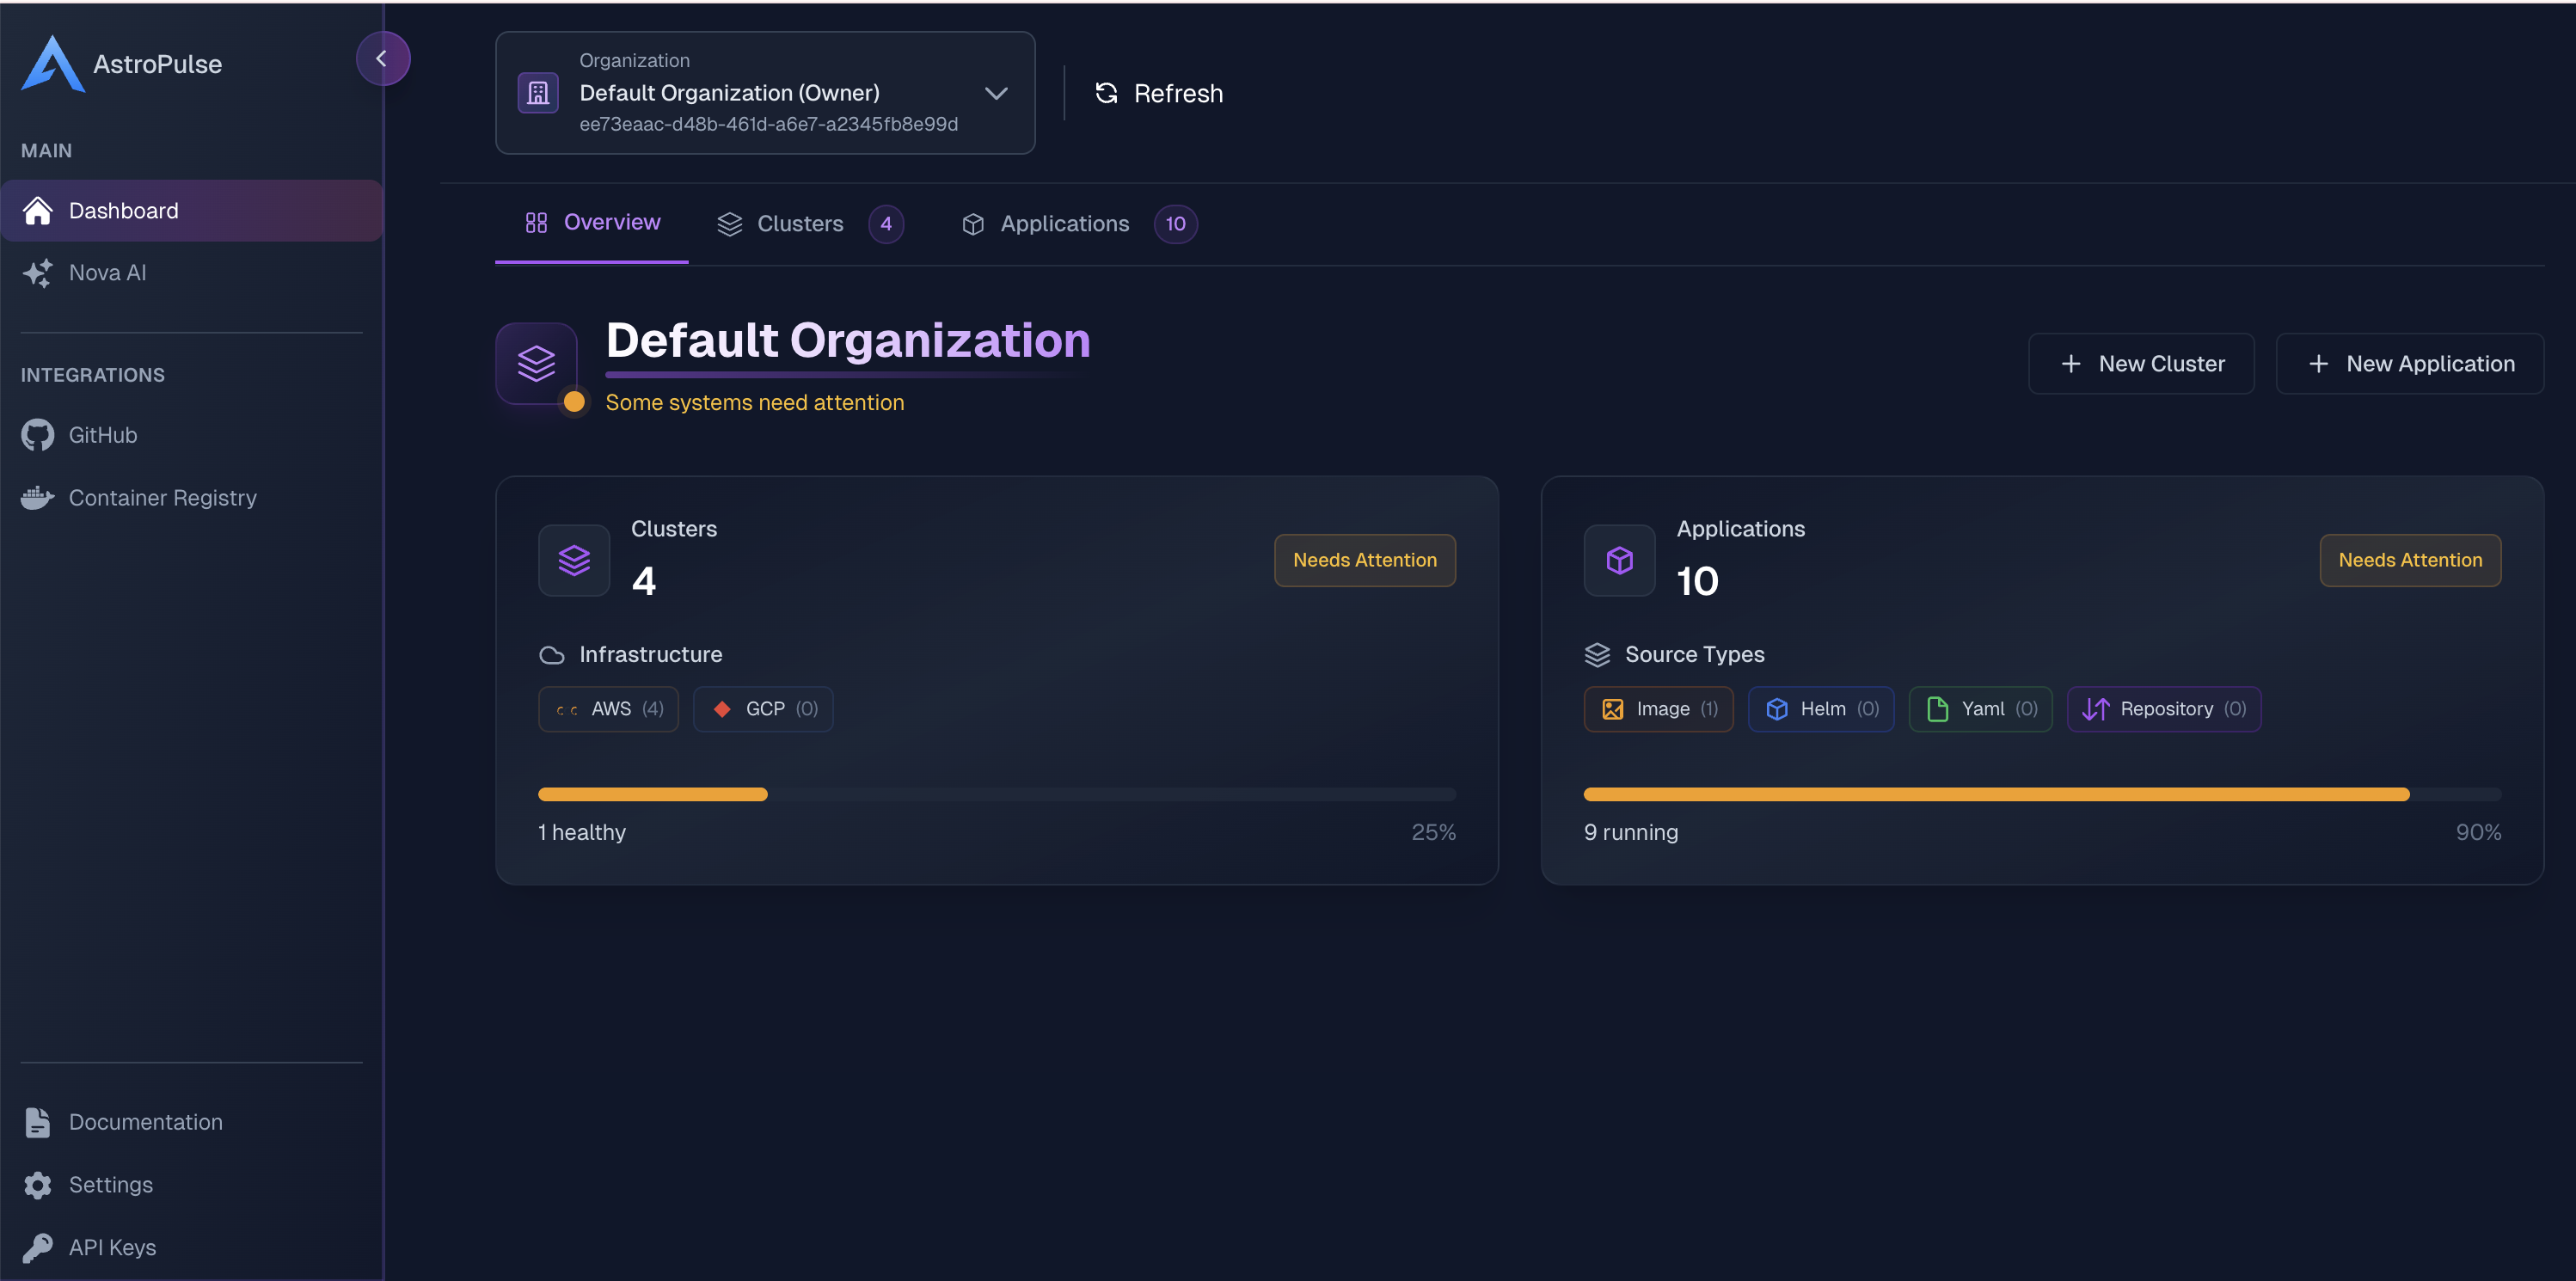
Three ways to follow along. Each step below leads with the console walkthrough, with the CLI and AI equivalents in the tabs underneath:
- Console: point and click; the walkthroughs below are the real UI.
- CLI:
astroctl …, copy-paste ready. - AI: ask Nova in the console, or connect your editor's assistant to the AstroPulse MCP (
platform.astropulse.io/mcp) and describe what you want. For building an image straight from a repo, theastro-deployMCP does that too.
Before you start: one cluster with cloud identity
You need exactly one thing: a Kubernetes cluster connected to AstroPulse, running with the cloud's own identity — IRSA on AWS, Workload Identity on GCP/Azure. That identity is what lets ExternalDNS manage DNS and cert-manager solve ACME challenges without ever handling a cloud credential.
The easy path is to let AstroPulse provision the cluster. It wires that identity up for you:
- CLI
- Ask your AI
$ # one-time: connect your cloud account
astroctl cloud aws connect --account-id 123456789012 --region us-east-1 --cluster-name prod

# provision the cluster — IRSA / Workload Identity is set up automatically
astroctl infra k8s apply -f cluster.yaml
Already run your own cluster? Register it instead, then set up the identity per the add-on docs:
$ astroctl infra k8s register --cluster-name my-cluster
Step 1: Install the three add-ons
On your cluster's Add-ons tab, choose Install Add-on and pick from the catalog. Each installs with production-sensible defaults; you tune only what matters.
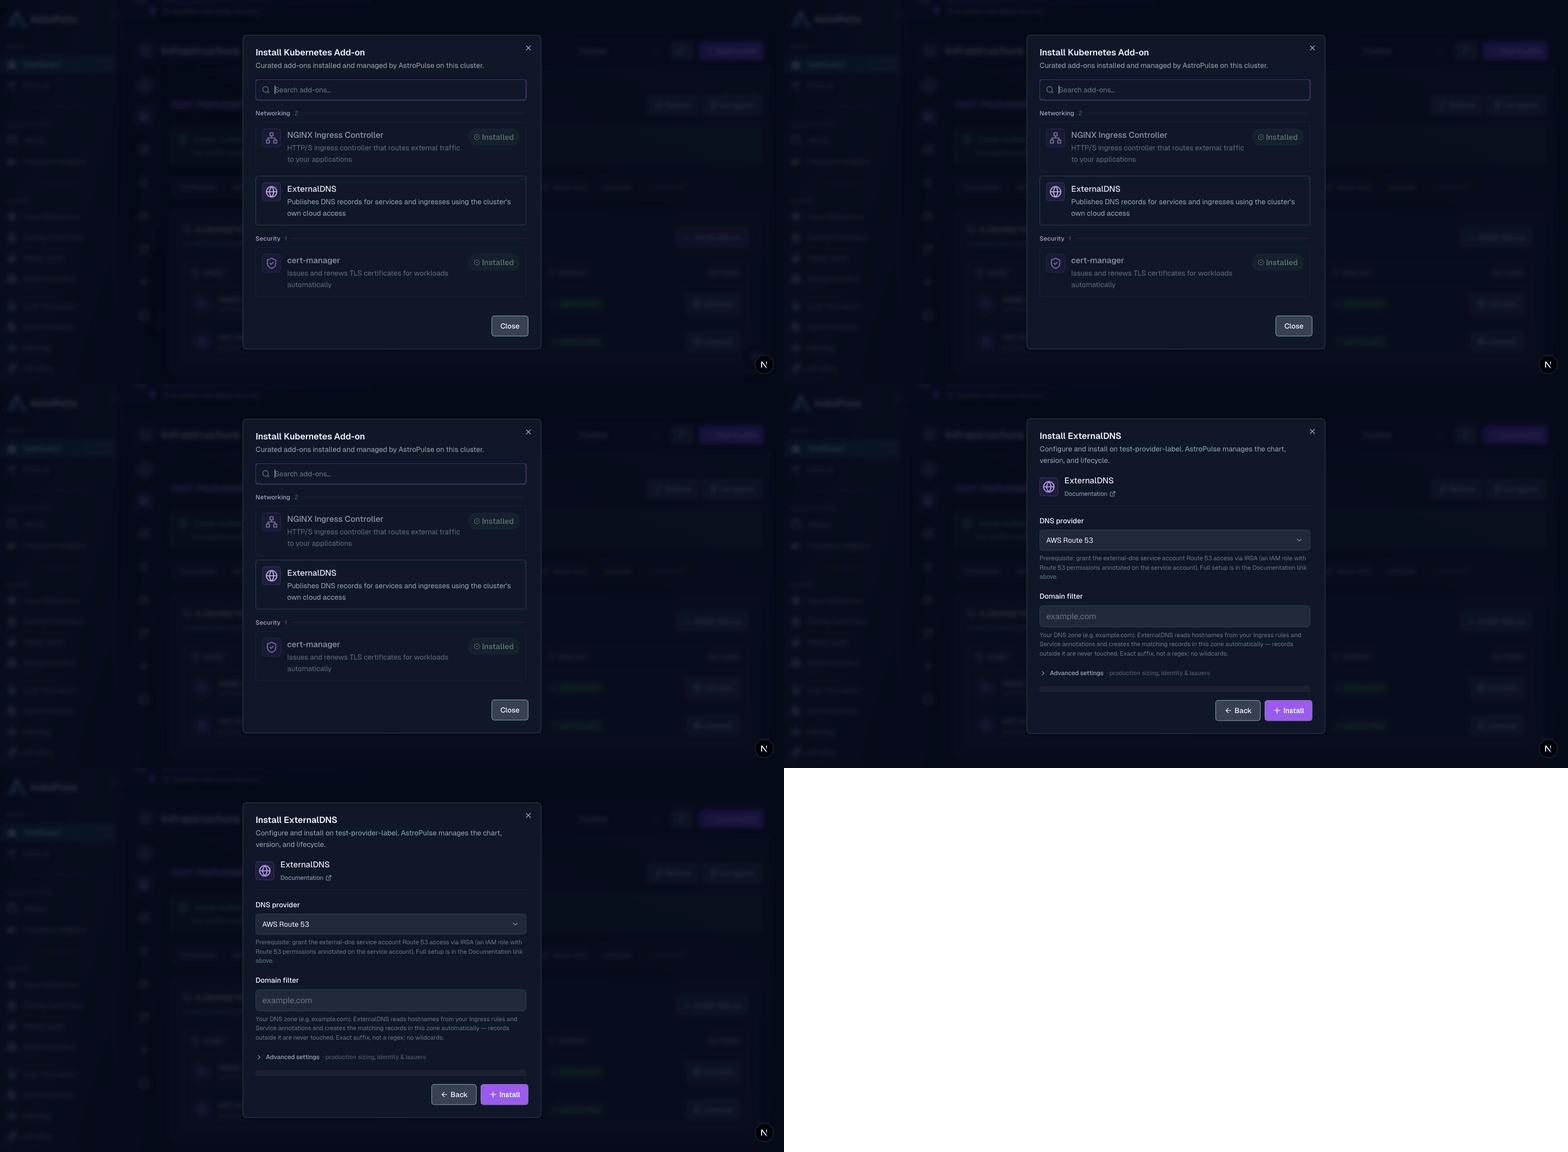
- NGINX Ingress: routes public traffic. The default terminates TLS at the ingress (there's a passthrough option for backends that terminate their own). On a cloud cluster it comes up behind a real LoadBalancer with the right provider annotations already set.
- cert-manager: issues and renews TLS certificates. Turn on Create a Let's Encrypt ClusterIssuer and add a contact email for real, auto-renewing public certificates, with no manual cert wrangling.
- ExternalDNS: publishes DNS records for your apps. Pick your DNS provider and set the domain filter to your zone (e.g.
example.com). It uses the cluster identity from the prerequisite step, so no keys are ever stored.
- CLI
- Ask your AI
Prefer YAML? The same add-ons apply declaratively. Copy-paste the example manifests:
$ astroctl infra k8s addons apply -f nginx-ingress.yaml
astroctl infra k8s addons apply -f cert-manager.yaml
astroctl infra k8s addons apply -f external-dns.yaml
astroctl infra k8s addons get prod        # all add-ons + health
Installed together, they compose into automatic, production-grade HTTPS: cert-manager solves the ACME challenge through NGINX, ExternalDNS creates the DNS record, and NGINX terminates TLS at the edge with the issued certificate. Certificates renew themselves.
Step 2: Verify your domain, once
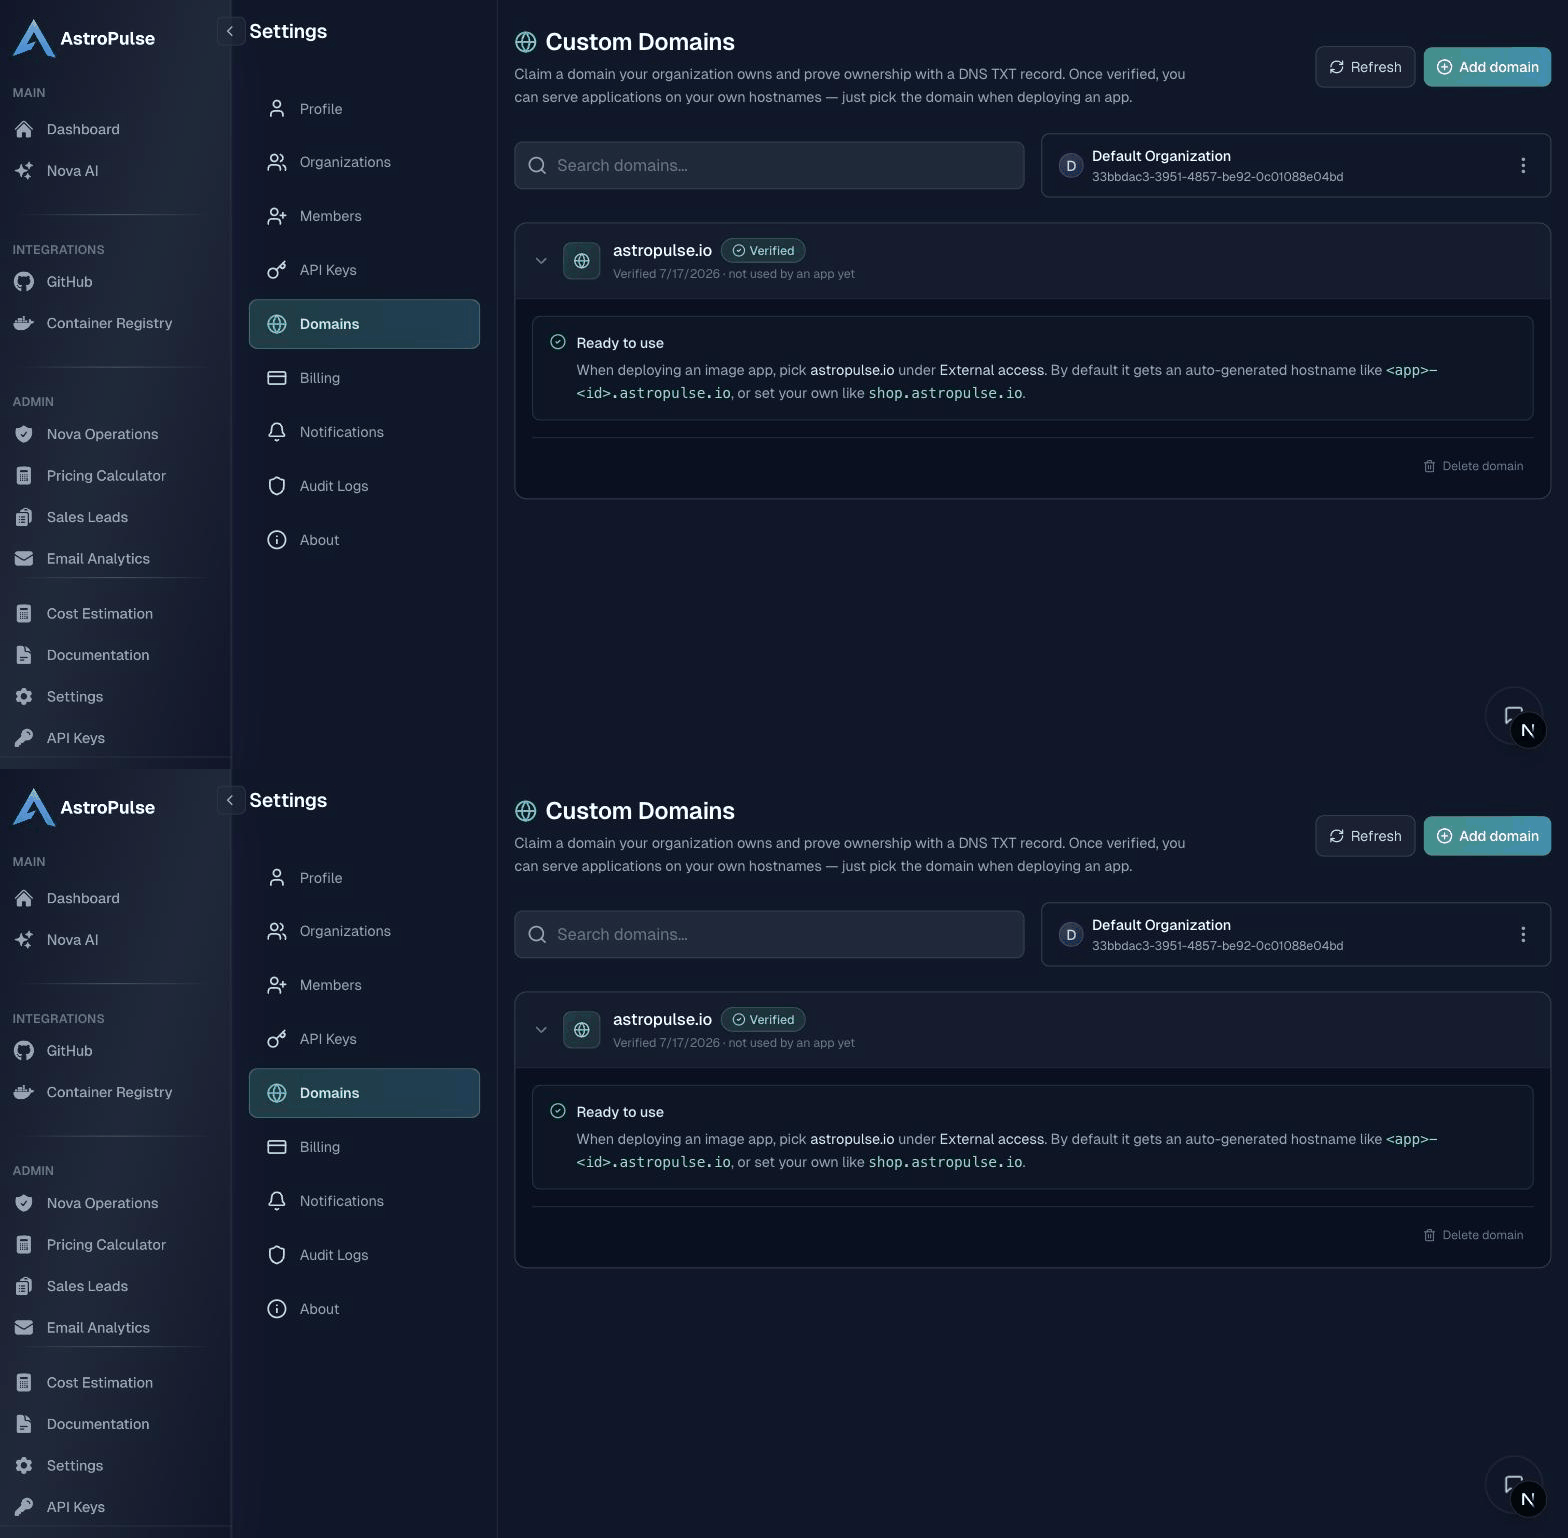
In Settings → Domains, add a domain you control and publish the TXT record it shows you. Once it verifies, every internet-facing app can serve on it, on a hostname you choose (shop.example.com) or an auto-generated one.
- CLI
- Ask your AI
$ astroctl domain add example.com      # prints the TXT record to publish
astroctl domain verify example.com   # run once DNS has propagated
See Custom Domains for the details.
Step 3: Deploy a container image on your domain
Custom domains attach to Container Image applications; that's the exposure model. Here's a ready-made image so you can watch the whole thing light up:
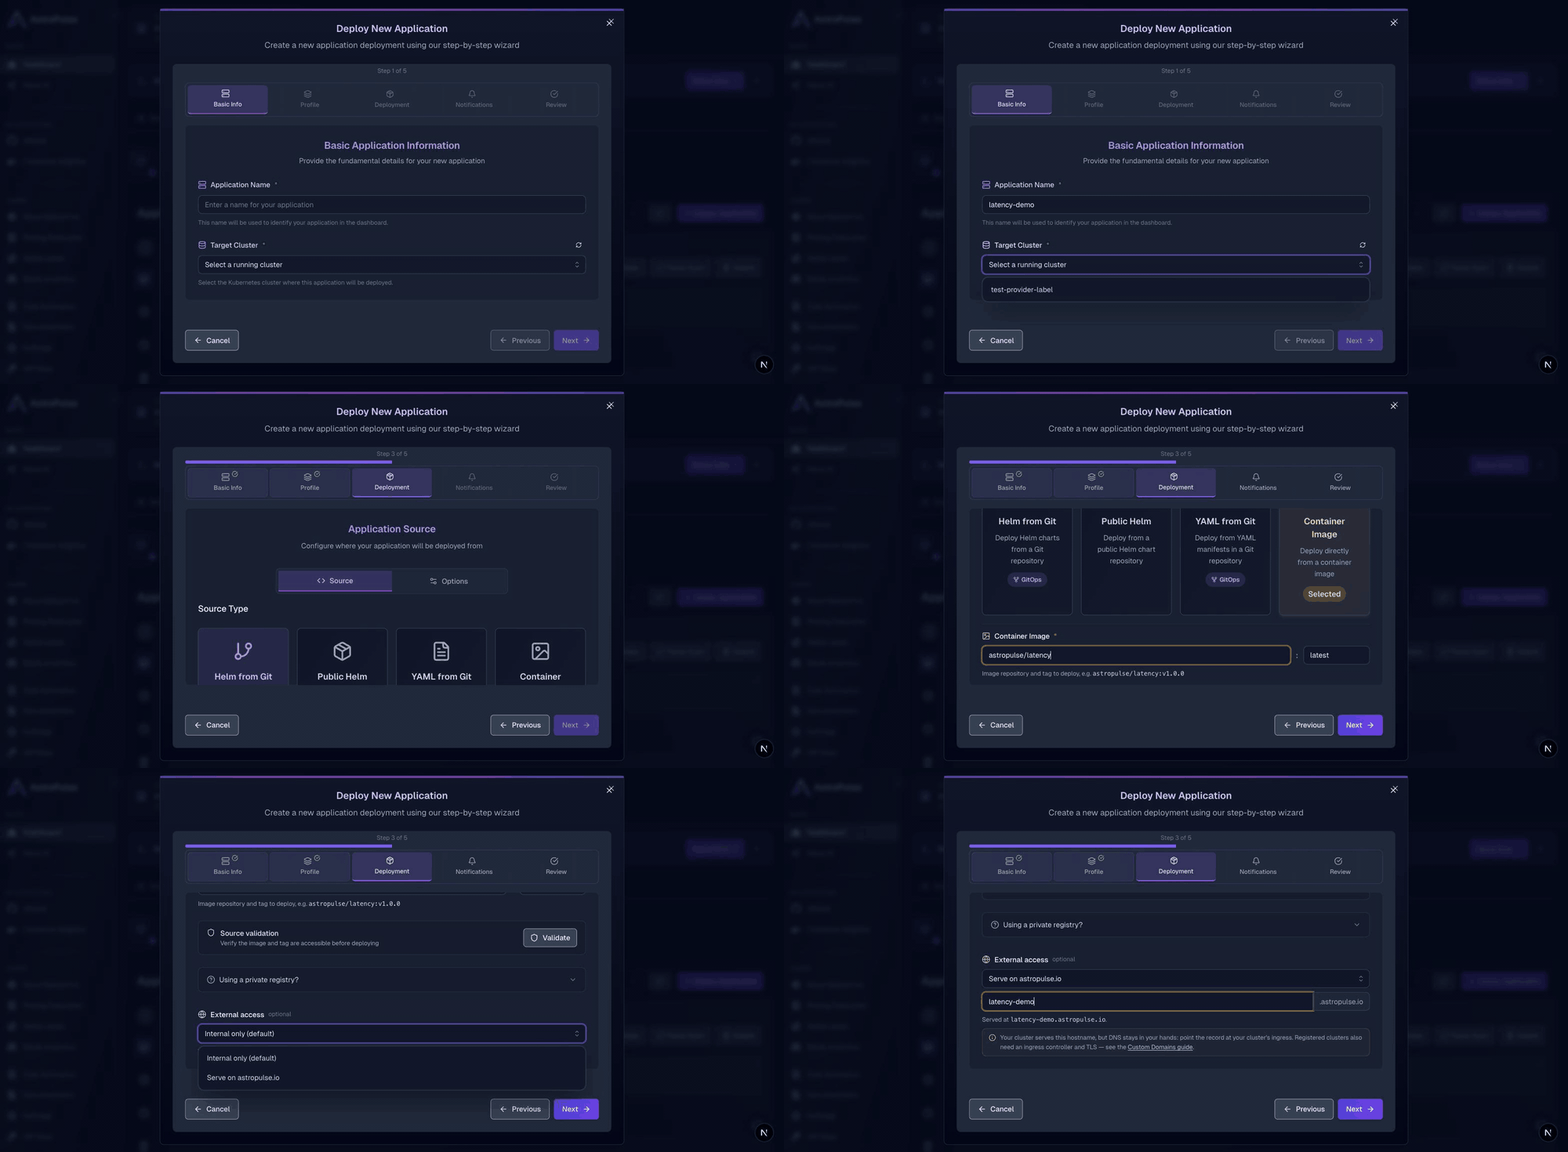
- Deploy Application → Container Image, image
astropulse/latency:v1.0.0. - Under External access, pick your verified domain and a hostname (or leave it blank to auto-generate
<app>-<id>.example.com). - Deploy.
Within a minute or two the app is running, its DNS record and TLS certificate are created for you, and it's live on https://<your-host>.example.com.
- CLI
- Ask your AI
$ cat <<'EOF' | astroctl app apply -f -
apiVersion: platform.astropulse.io/v1
kind: Application
spec:
name: latency-demo
profileName: <YOUR_PROFILE_NAME>   # list: astroctl app profile get
source:
  type: image
  image:
    registry: docker.io
    repository: astropulse/latency
    tag: v1.0.0
externalAccess:
  domain: example.com              # verified domain → latency-demo-<id>.example.com
EOF
Test it locally: no cloud needed
Want to validate the wiring before touching a cloud account? The whole flow runs on a local kind cluster, with a few local swaps:
- NGINX: install it with Expose via NodePort (Advanced settings). kind has no cloud LoadBalancer, so the controller is reachable on a node port instead. That's the only local-vs-cloud difference.
- cert-manager: enable a self-signed ClusterIssuer: no ACME account, no public DNS, no email. It's Ready offline, which is all you need to prove the TLS path.
- ExternalDNS: skip it locally; it needs a real cloud DNS zone.
Deploy any container image with an ingressClassName: nginx Ingress and it's reachable through NGINX exactly as it would be through a cloud LoadBalancer in production. Full steps are in the add-on docs' local testing section.
The point
The blueprint still stands if you want to own every piece. But the ingress, TLS, and DNS plumbing is now something AstroPulse installs, keeps healthy, and upgrades for you, reachable from a console, a CLI, or a sentence to your AI. Push an image, get a live URL on your own domain with real HTTPS. That's the whole idea.